Transforming your kitchen into an efficient cooking haven is all about the right tools.
With the right essential kitchen gadgets, not only can meal prep become a breeze, but you can also level up your culinary skills.
Let’s uncover which must-have appliances can make your routines smoother and more enjoyable, so you can spend less time fussing and more time feasting.
From countertop wonders to handy utensils, we’ve got the scoop on what’s truly essential for every kitchen enthusiast.
Contents
- 1. The Mighty Multi-Cooker
- 2. The Blender: Your Smoothie Sidekick
- 3. The Air Fryer: Crispy Without the Guilt
- 4. The Instant Pot: One-Pot Wonder
- 5. The Essential Knife Set
- 6. The Must-Have Food Processor
- 7. The Smart Scale
- 8. The Kitchen Thermometer: Precision Cooking
- 9. The Indispensable Cast Iron Skillet
- 10. The Electric Kettle: Speed and Convenience
- 11. The Spice Grinder: Fresh Flavor Boost
- 12. The Reusable Food Storage Bags
- 13. The Slow Cooker: Set It and Forget It
- 14. The Coffee Maker: Your Morning Ritual
- 15. The Pressure Cooker: Speed Meets Flavor
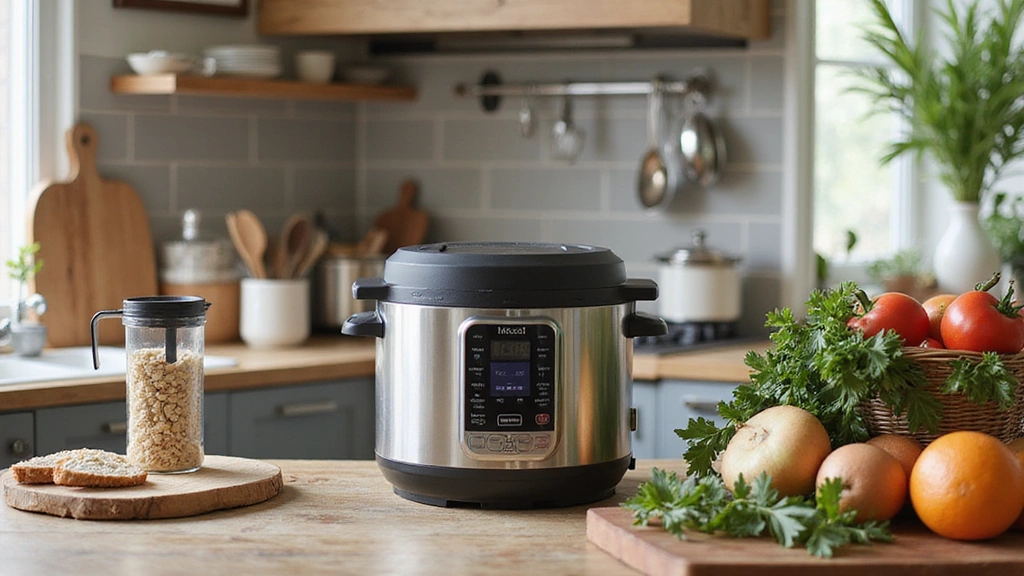
1. The Mighty Multi-Cooker

The multi-cooker is a game changer, combining the functions of a pressure cooker, slow cooker, rice cooker, and more into one compact machine. Imagine tossing in ingredients in the morning and coming home to a perfectly cooked meal without any fuss. These gadgets often come with preset programs for soups, stews, grains, and even yogurt, making them incredibly versatile.
For a top-notch option, consider the Ninja MC1010 Foodi PossibleCooker PLUS, which is a 6-in-1 multi-cooker with an impressive 8.5-quart capacity. It combines sous vide and proofing functions, ideal for those looking to elevate their culinary skills. Its user-friendly interface simplifies meal prep, ensuring you spend less time in the kitchen.
Here are a few key benefits:
– Time-Saving: Cook meals up to 70% quicker than traditional methods.
– Space-Efficient: Ditch the clutter; one device can handle multiple cooking styles, like the versatile Ninja Foodi 9-in-1 Pressure Cooker and Air Fryer, which combines pressure cooking with air frying capabilities.
– Easy to Use: Most models have clear digital displays, including the Hamilton Beach Digital Programmable Slow Cooker, perfect for those who prefer a no-fuss slow cooking experience.
Pro tip: Always read the manual for optimal usage and cleaning instructions, so you can keep your gadget in top shape and ready for your next culinary adventure!
Creamy Chicken and Rice in the Multi-Cooker
This comforting dish is a breeze to whip up in your multi-cooker, making it a perfect weeknight meal.
Ingredients:
– 1 lb boneless, skinless chicken thighs
– 1 cup long-grain white rice
– 1 onion, diced
– 2 cloves garlic, minced
– 3 cups chicken broth
– 1 cup frozen peas
– 1 tsp dried thyme
– 1 tsp paprika
– Salt and pepper to taste
– 2 tbsp olive oil
– Fresh parsley for garnish (optional)
Instructions:
1. Sauté the Aromatics: Set your multi-cooker to the sauté mode. Add olive oil and let it heat up. Add the diced onion and garlic, cooking until softened, about 3-4 minutes.
2. Brown the Chicken: Add the chicken thighs to the pot, season with salt, pepper, thyme, and paprika. Sear the chicken for about 2-3 minutes on each side until lightly browned.
3. Add Rice and Broth: Stir in the rice, ensuring it’s well mixed with the chicken and onion mixture. Pour in the chicken broth and give everything a good stir.
4. Pressure Cook: Close the lid securely and set the multi-cooker to pressure cook on high for 10 minutes. Once the cooking time is complete, allow for a natural pressure release for 10 minutes, then perform a quick release for any remaining pressure.
5. Add Peas and Serve: Open the lid and stir in the frozen peas. Let it sit for a couple of minutes to warm the peas through. Serve hot, garnished with fresh parsley if desired.
This recipe showcases the efficiency and versatility of your multi-cooker, transforming simple ingredients into a satisfying meal with minimal effort.
2. The Blender: Your Smoothie Sidekick

When it comes to creating nutritious meals and snacks, a high-performance blender stands out as one of the essential kitchen gadgets. Not only does it make smoothies a breeze, but it also opens the door to a variety of dishes, from silky soups to homemade sauces. Whether you’re whipping up a morning smoothie or prepping ingredients for a savory dish, having a quality blender can significantly enhance your kitchen efficiency.
One of my favorite recipes to try in a solid blender is a Green Power Smoothie. It’s packed with nutrients and can be customized to your taste. Here’s how to make it:
Ingredients:
– 1 cup spinach (fresh or frozen)
– 1 medium banana (frozen for a creamier texture)
– 1/2 cup frozen pineapple chunks
– 1/2 cup almond milk (or any milk of your choice)
– 1 tablespoon chia seeds (optional for added fiber)
– 1 scoop protein powder (optional for extra protein)
– A handful of ice (if you want it extra cold)
Instructions:
1. Start by adding the almond milk to the blender. Pouring the liquid first helps the blending process.
2. Next, add the spinach. If you’re using fresh spinach, pack it tightly for maximum nutrition.
3. Add the frozen banana and pineapple chunks. These fruits provide natural sweetness and creaminess.
4. If you’re using chia seeds and protein powder, add those next. They’ll boost the nutritional value without altering the flavor much.
5. Finally, toss in a handful of ice if you prefer your smoothie chilled and thick.
6. Secure the blender lid and blend on high until all ingredients are thoroughly combined and smooth. This usually takes about 30-60 seconds.
7. Once blended, pour the smoothie into a glass or your favorite travel cup. Enjoy immediately for the best flavor and nutrient retention!
With this Green Power Smoothie, you’ll see just how simple it is to incorporate more fruits and veggies into your daily routine. Plus, the versatility of a solid blender allows you to experiment with different ingredients and flavors, making healthy eating enjoyable and effortless.
3. The Air Fryer: Crispy Without the Guilt

When it comes to healthy eating without sacrificing flavor, the air fryer stands out as a must-have appliance in any kitchen. This innovative gadget circulates hot air to create that desired crunch, all while significantly reducing the amount of oil used in cooking.
With the COSORI Air Fryer 9-in-1, you can enjoy a variety of cooking methods that not only keep your meals flavorful but also cut down on unhealthy fats. From crispy air-fried vegetables to homemade fries, this appliance is perfect for anyone looking to maintain a healthier lifestyle.
To get you started, here’s a simple recipe for air-fried crispy sweet potato fries that you can whip up in no time!
Ingredients:
– 2 medium sweet potatoes, peeled and cut into fries
– 1 tablespoon olive oil
– 1 teaspoon paprika
– 1 teaspoon garlic powder
– ½ teaspoon salt
– ½ teaspoon black pepper
– Optional: Fresh herbs for garnish
Instructions:
1. Prep the Sweet Potatoes: Start by peeling the sweet potatoes and slicing them into fry shapes. Aim for uniform thickness to ensure even cooking.
2. Season: In a large bowl, combine the cut sweet potatoes with olive oil, paprika, garlic powder, salt, and black pepper. Toss until all the fries are evenly coated.
3. Preheat Air Fryer: Preheat your COSORI Air Fryer to 400°F (200°C) for about 5 minutes.
4. Air Fry: Place the seasoned sweet potato fries in the air fryer basket in a single layer. Cook for 15-20 minutes, shaking the basket halfway through to ensure even crispiness.
5. Check for Crispiness: After 15 minutes, check the fries. If you prefer them crispier, add an additional 2-5 minutes of cooking time.
6. Serve: Once cooked to your liking, remove the fries from the air fryer. Garnish with fresh herbs if desired and enjoy your guilt-free snack!
Adding an air fryer to your kitchen arsenal not only enhances your cooking efficiency but also opens up a world of healthier culinary possibilities. With recipes like these, you’ll find it hard to go back to traditional frying methods!
4. The Instant Pot: One-Pot Wonder

The Instant Pot has revolutionized meal preparation, allowing you to create flavorful dishes in a fraction of the time. It’s a pressure cooker, slow cooker, rice cooker, and steamer—all rolled into one! If you’re short on time but still want home-cooked meals, this gadget is a lifesaver.
Here’s why you should consider it:
– Fast cooking: Meals that usually take hours can be done in under an hour, making it perfect for busy schedules.
– Flavor enhancement: Pressure cooking locks in moisture and flavor, making meats tender and delicious.
– Versatility: From soups and stews to desserts, the possibilities are endless.
To maximize your Instant Pot experience, consider the [Instant Pot Duo 7-in-1 Electric Pressure Cooker](https://www.amazon.com/dp/B01NBKTPTS?tag=pintere03ac8c-20), which combines multiple cooking functions into one compact appliance, making it an essential gadget for any kitchen.
If you often find yourself needing extra accessories, the [silicone Instant Pot accessories set](https://www.amazon.com/dp/B008BKHGX0?tag=pintere03ac8c-20) is a great addition. It includes essential tools that help you make the most out of your cooking sessions, ensuring that you can tackle a variety of recipes with ease.
For those who are new to pressure cooking or looking to try new dishes, the [Instant Pot recipe book for beginners](https://www.amazon.com/dp/0316460834?tag=pintere03ac8c-20) offers 100 simple recipes with step-by-step photographs, making it easy to create spectacular results every time.
Here’s a simple and delicious recipe to get you started:
Instant Pot Chicken and Rice
Ingredients:
– 1 lb boneless, skinless chicken breasts
– 1 cup long-grain white rice
– 1 ½ cups chicken broth
– 1 cup frozen mixed vegetables (peas, carrots, corn)
– 1 small onion, diced
– 2 cloves garlic, minced
– 1 tsp salt
– ½ tsp black pepper
– 1 tsp paprika
– 1 tbsp olive oil
Instructions:
1. Sauté the Aromatics: Turn on the Instant Pot and select the “Sauté” function. Add olive oil, then sauté the diced onion and minced garlic until fragrant, about 2-3 minutes.
2. Brown the Chicken: Season the chicken breasts with salt, pepper, and paprika. Add them to the pot and brown on both sides for about 3-4 minutes.
3. Add Rice and Broth: Pour in the rice and chicken broth, ensuring the rice is evenly distributed.
4. Add Vegetables: Stir in the frozen mixed vegetables.
5. Pressure Cook: Close the lid and set the valve to sealing. Select the “Manual” or “Pressure Cook” setting and set the timer for 10 minutes.
6. Natural Release: Once cooking is complete, let the pressure release naturally for 10 minutes before quick-releasing any remaining pressure.
7. Fluff and Serve: Open the lid, fluff the rice with a fork, and serve hot. Enjoy your tender chicken and flavorful rice!
Experiment with recipes that allow for creative combinations of ingredients, and enjoy the delectable results without the hours in the kitchen!
5. The Essential Knife Set

When it comes to essential kitchen gadgets, having the right knife set is crucial for efficiency in meal preparation. A quality knife set not only speeds up your cooking process but also enhances safety, allowing you to chop and slice with confidence. The right knives can transform your kitchen experience, making it enjoyable rather than a chore.
To put your new knife skills to the test, try this simple and delicious recipe for a classic vegetable stir-fry. It’s quick to prepare and showcases how your knives can make the process seamless.
Ingredients:
– 2 tablespoons vegetable oil
– 1 bell pepper, sliced
– 1 cup broccoli florets
– 1 carrot, julienned
– 1 zucchini, sliced
– 1 cup snap peas
– 3 cloves garlic, minced
– 2 tablespoons soy sauce
– 1 tablespoon sesame oil
– Cooked rice or noodles, for serving
Instructions:
1. Heat the vegetable oil in a large skillet or wok over medium-high heat.
2. Add the sliced bell pepper and carrot, stir-frying for about 2 minutes until they start to soften.
3. Toss in the broccoli, zucchini, and snap peas. Continue to stir-fry for an additional 3-4 minutes, or until the vegetables are tender-crisp.
4. Add the minced garlic to the pan and stir for about 30 seconds until fragrant.
5. Drizzle the soy sauce and sesame oil over the vegetables, tossing to combine and heat through for another minute.
6. Serve the stir-fry over cooked rice or noodles, and enjoy a fresh, vibrant meal that highlights your knife skills!
With the right knives and this quick recipe, you’ll see just how much easier meal prep can be, illustrating the importance of investing in quality kitchen tools.
6. The Must-Have Food Processor

Imagine whipping up a delicious meal in no time, thanks to your trusty food processor. This essential kitchen gadget not only saves you hours during meal prep but also elevates your cooking game. With the capability to chop, slice, and mix in a flash, it’s a true multitasker in the kitchen.
Whether you’re making dough for a homemade pizza or shredding cheese for a comforting casserole, a food processor simplifies the process. Its efficiency allows you to tackle various cooking tasks, making it an indispensable tool for busy cooks. You’ll find that having a food processor on hand can inspire you to try new recipes and experiment more in the kitchen.
Here’s a delicious recipe to get you started with your food processor:
Recipe: Classic Hummus
Ingredients:
– 1 can (15 oz) chickpeas, drained and rinsed
– 1/4 cup fresh lemon juice (about 1 large lemon)
– 1/4 cup tahini
– 1 small garlic clove, minced
– 2 tablespoons extra virgin olive oil
– 1/2 teaspoon ground cumin
– Salt to taste
– Water, as needed
– Paprika and chopped parsley for garnish
Instructions:
1. In your food processor, combine the chickpeas, lemon juice, tahini, and minced garlic.
2. Blend until smooth, scraping down the sides as necessary.
3. While the processor is running, drizzle in the olive oil and add the ground cumin.
4. If the hummus is too thick, add water a tablespoon at a time until you reach your desired consistency.
5. Season with salt to taste. Blend again to mix everything thoroughly.
6. Transfer the hummus to a serving bowl, and drizzle with a little extra olive oil.
7. Garnish with a sprinkle of paprika and chopped parsley before serving.
This easy and delicious hummus is just one example of what you can create with a food processor. The speed and consistency it offers can transform your meal prep routine, making it easier than ever to enjoy homemade dishes.
7. The Smart Scale

In the world of home cooking and baking, accuracy is vital for achieving the best results. Incorporating a smart kitchen scale into your routine can transform your culinary adventures, making it easier to follow recipes and maintain consistency. With its ability to provide precise measurements, a smart scale ensures that you’re not just guessing your ingredient amounts.
For those who are health-conscious, the added functionality of a nutritional calculator, like the one found in the Etekcity smart food kitchen scale, can be a game changer. Tracking your nutrient intake while cooking allows you to make informed choices that align with your dietary goals.
Beyond precision, the convenience of a smart scale extends to its multi-functional capabilities, which can save time and reduce clutter in your kitchen. Coupled with a quality set of measuring cups and spoons, you can tackle any recipe with confidence.
### Classic Banana Bread Recipe
Ingredients:
– 3 ripe bananas (about 1 ½ cups mashed)
– 1/3 cup melted butter
– 1 teaspoon baking soda
– Pinch of salt
– ¾ cup sugar (can substitute with brown sugar)
– 1 large egg, beaten
– 1 teaspoon vanilla extract
– 1 cup all-purpose flour
Instructions:
1. Preheat your oven to 350°F (175°C). Grease a 4×8 inch loaf pan.
2. In a mixing bowl, mash the ripe bananas with a fork until smooth. Use your smart scale to weigh the bananas if you prefer precise measurements.
3. Stir the melted butter into the mashed bananas until well combined.
4. Mix in the baking soda and salt.
5. Add the sugar, beaten egg, and vanilla extract, stirring until fully incorporated.
6. Finally, mix in the flour until just combined. Be careful not to overmix.
7. Pour the batter into the greased loaf pan and smooth the top.
8. Bake for 60-65 minutes, or until a toothpick inserted into the center comes out clean.
9. Allow cooling in the pan for about 10 minutes before transferring to a wire rack to cool completely.
Using your smart scale for this recipe will help you achieve a perfectly balanced banana bread every time. Happy baking!
8. The Kitchen Thermometer: Precision Cooking

When it comes to achieving culinary perfection, a kitchen thermometer is a must-have gadget in any kitchen. Whether you’re grilling a steak, roasting a chicken, or making candy, having the right temperature is crucial for both safety and flavor. With a reliable thermometer, you can ensure your dishes turn out exactly as intended, every time.
Using a thermometer not only enhances food safety by avoiding undercooked or overcooked meat, but it also helps you achieve the perfect texture and flavor in your dishes. Imagine biting into a juicy steak or enjoying perfectly tempered chocolate—this is the power of precision cooking.
To get you started on your journey to culinary excellence, here’s a simple recipe that showcases the importance of using a kitchen thermometer.
Juicy Grilled Chicken Breast
Ingredients:
– 4 boneless, skinless chicken breasts
– 2 tablespoons olive oil
– 1 tablespoon lemon juice
– 2 teaspoons garlic powder
– 2 teaspoons paprika
– 1 teaspoon salt
– 1 teaspoon black pepper
Instructions:
1. Prepare the Marinade: In a bowl, whisk together olive oil, lemon juice, garlic powder, paprika, salt, and black pepper.
2. Marinate the Chicken: Place the chicken breasts in a resealable plastic bag or a shallow dish. Pour the marinade over the chicken, ensuring it’s well-coated. Seal the bag or cover the dish, and refrigerate for at least 30 minutes, or up to 4 hours for more flavor.
3. Preheat the Grill: Preheat your grill to medium-high heat (about 375°F to 400°F).
4. Check the Temperature: While the grill heats up, take your kitchen thermometer and ensure it’s ready for use.
5. Grill the Chicken: Remove the chicken from the marinade and place it on the grill. Cook for 6-8 minutes on one side.
6. Flip and Monitor: Flip the chicken breasts over and continue grilling for another 6-8 minutes. Insert the thermometer into the thickest part of the chicken to check the internal temperature.
7. Ensure Proper Cooking: The chicken is safe to eat when it reaches an internal temperature of 165°F. If it hasn’t reached this temperature, continue cooking and checking every couple of minutes.
8. Rest and Serve: Once cooked, remove the chicken from the grill and let it rest for 5 minutes before slicing. This allows the juices to redistribute, ensuring a juicy result.
9. Enjoy: Serve the grilled chicken with your favorite sides and enjoy the fruits of your precision cooking!
Investing in a kitchen thermometer not only elevates your cooking but also gives you the confidence to try new recipes. With the right tools, you’re on your way to impressing family and friends with your culinary skills.
9. The Indispensable Cast Iron Skillet

A cast iron skillet isn’t just a cooking tool; it’s an heirloom. With proper care, it can last for generations and enhance the flavor of your dishes over time. From frying eggs to baking cornbread, its versatility and heat retention are unmatched.
Here’s why you’ll love it:
– Durable: Cast iron is virtually indestructible and can withstand high temperatures.
– Natural non-stick surface: With seasoning, you get a natural non-stick surface that improves with use.
– Even heating: Perfect for searing meats and sautéing vegetables.
To make the most of your cooking experience, consider the [Lodge cast iron skillet](https://www.amazon.com/dp/B00006JSUA?tag=pintere03ac8c-20), a pre-seasoned option that’s ready to use straight out of the box. Its 10.25-inch size is ideal for everyday meals, whether you’re using it in the oven, on the stove, or even grilling outdoors.
If you’re planning a camping trip or looking for a larger skillet for family meals, check out the [Camp Chef cast iron skillet](https://www.amazon.com/dp/B000AL3KGU?tag=pintere03ac8c-20). This 12-inch skillet features dual pour spouts for easy serving and is ready to use, making it a durable essential for both camping and home cooking.
For a touch of style, the [Cuisinart cast iron skillet](https://www.amazon.com/dp/B0018AGJTW?tag=pintere03ac8c-20) in Provencal Blue adds a pop of color to your kitchen. This 10-inch enameled skillet combines functionality with aesthetics, allowing for even cooking and a beautiful presentation.
Embrace the art of cooking with cast iron, and try your hand at a classic recipe for skillet cornbread. This delicious dish is perfect as a side or a main attraction at any meal.
Ingredients:
– 1 cup cornmeal
– 1 cup milk
– 2 large eggs
– 1/4 cup sugar
– 1/4 cup vegetable oil or melted butter
– 1 teaspoon baking powder
– 1/2 teaspoon baking soda
– 1/2 teaspoon salt
Instructions:
1. Preheat your oven to 425°F (220°C) and place your cast iron skillet inside to heat.
2. In a mixing bowl, combine the cornmeal, baking powder, baking soda, and salt.
3. In another bowl, whisk together the milk, eggs, sugar, and oil or melted butter until well combined.
4. Pour the wet ingredients into the dry ingredients and stir until just combined.
5. Carefully remove the hot skillet from the oven and add a little oil or butter to coat the bottom.
6. Pour the batter into the skillet, spreading it evenly.
7. Bake for 20-25 minutes, or until the edges are golden and a toothpick inserted in the center comes out clean.
8. Allow to cool slightly before slicing and serving.
Enjoy your homemade cornbread, and cherish the memories it brings around the table!
10. The Electric Kettle: Speed and Convenience

The electric kettle is not just a time-saver; it also opens the door to a world of brewing possibilities. With the right kettle, you can enjoy the perfect cup of tea or coffee tailored to your taste. Whether you’re in a hurry or looking to savor every sip, having an electric kettle in your kitchen is a game changer.
One delightful way to make use of your electric kettle is by preparing a refreshing herbal tea. Here’s a simple recipe to get you started:
Herbal Mint Tea Recipe
Ingredients:
– 2 cups water
– 1 tablespoon dried mint leaves (or 2-3 fresh mint sprigs)
– 1 teaspoon honey (optional)
– Lemon slices (optional)
Instructions:
1. Boil the Water: Fill your electric kettle with 2 cups of water and set it to boil.
2. Prepare the Mint: While the water is heating, place the dried mint leaves or fresh mint sprigs into a teapot or heatproof pitcher.
3. Pour the Water: Once the water has reached boiling point, carefully pour it over the mint in the teapot.
4. Steep: Allow the mint to steep for about 5-7 minutes, depending on how strong you like your tea.
5. Sweeten: If desired, stir in a teaspoon of honey for sweetness.
6. Serve: Pour the tea into your favorite mug, adding a slice of lemon for an extra zing if you like. Enjoy your soothing herbal mint tea!
This simple recipe highlights the efficiency of an electric kettle, allowing you to brew delicious beverages quickly and conveniently. With just a few ingredients and steps, you can enjoy a warm cup of herbal tea at any time of the day.
11. The Spice Grinder: Fresh Flavor Boost

To elevate your culinary creations, using freshly ground spices is a game changer. A spice grinder not only enhances flavor but also allows for customization that pre-ground spices can’t provide. Whether you opt for a manual or electric grinder, the process of grinding spices just before cooking brings out their aromatic qualities, making your dishes truly special.
For a simple yet effective spice blend, try this recipe for a versatile seasoning mix that can be used on meats, vegetables, or even in soups.
### Ingredients:
– 2 tablespoons whole black peppercorns
– 2 tablespoons cumin seeds
– 2 tablespoons coriander seeds
– 1 tablespoon mustard seeds
– 1 tablespoon dried thyme
– 1 tablespoon smoked paprika
– 1 teaspoon cayenne pepper (adjust to taste)
– 1 teaspoon sea salt
### Instructions:
1. Measure the Spices: Gather all your whole spices and measure them into a bowl.
2. Toast the Spices: In a dry skillet over medium heat, add the black peppercorns, cumin seeds, coriander seeds, and mustard seeds. Toast them for about 2-3 minutes until fragrant, stirring frequently to avoid burning.
3. Cool: Remove the skillet from heat and let the spices cool for a few minutes.
4. Grind the Spices: Using your manual or electric spice grinder, add the cooled spices along with the dried thyme, smoked paprika, cayenne pepper, and sea salt. Grind until you achieve your desired texture, whether fine or coarse.
5. Store: Transfer the spice blend into your spice storage jars. Seal them tightly to retain freshness.
6. Use: Sprinkle this spice blend on grilled or roasted vegetables, use it to season meats before cooking, or stir it into soups for a flavorful boost.
Experimenting with different spices and blends allows you to tailor flavors to your liking, making every meal a unique experience. Enjoy the vibrant aromas as you enhance your cooking with this simple yet effective spice blend!
12. The Reusable Food Storage Bags

Using reusable food storage bags not only helps reduce plastic waste but also enhances your kitchen efficiency. These bags are designed for longevity and versatility, making them a must-have in any eco-conscious kitchen. Whether you’re meal prepping for the week or just need to store leftovers, these bags are an essential tool that can simplify your cooking and storage processes.
One fantastic recipe to try using your reusable food storage bags is a delicious garlic herb marinated chicken. This dish is perfect for meal prep and can be easily stored in your reusable bags. Here’s how to make it:
Ingredients:
– 4 chicken breasts
– 1/4 cup olive oil
– 4 cloves garlic, minced
– 2 tablespoons fresh rosemary, chopped
– 2 tablespoons fresh thyme, chopped
– 1 tablespoon lemon juice
– Salt and pepper to taste
Instructions:
1. In a bowl, mix together the olive oil, minced garlic, rosemary, thyme, lemon juice, salt, and pepper.
2. Place the chicken breasts into your reusable food storage bag.
3. Pour the marinade over the chicken in the bag. Seal the bag tightly, ensuring that all the chicken is coated in the marinade.
4. Refrigerate for at least 1 hour, or overnight for maximum flavor.
5. Preheat your grill or oven to medium-high heat.
6. Remove the chicken from the bag and discard the marinade.
7. Grill or bake the chicken for 6-7 minutes on each side, or until the internal temperature reaches 165°F.
8. Allow the chicken to rest for a few minutes before slicing and serving.
These marinated chicken breasts are perfect for salads, sandwiches, or as a protein-packed addition to any meal. Using your reusable bags not only preserves the flavor but also keeps your kitchen organized and sustainable.
13. The Slow Cooker: Set It and Forget It

The slow cooker is a versatile appliance that can transform your cooking experience, making it easier and more enjoyable. With the ability to create rich, flavorful dishes without constant supervision, it’s a game-changer for busy individuals and families. Whether you’re preparing a comforting stew or a sweet dessert, the slow cooker simplifies meal preparation and allows you to focus on other activities while your food cooks to perfection.
Here’s a delicious recipe to try in your slow cooker:
Slow Cooker Beef Stew
Ingredients:
– 2 pounds beef chuck, cut into 1-inch cubes
– 4 medium carrots, sliced
– 3 potatoes, diced
– 1 onion, chopped
– 3 cloves garlic, minced
– 4 cups beef broth
– 2 tablespoons tomato paste
– 1 tablespoon Worcestershire sauce
– 1 teaspoon dried thyme
– 1 teaspoon dried rosemary
– Salt and pepper to taste
– 2 tablespoons olive oil (optional, for browning)
Instructions:
1. Prep the Ingredients: Start by chopping all your vegetables and cutting the beef into cubes. This will save you time when you’re ready to cook.
2. Brown the Beef (Optional): In a skillet over medium-high heat, add olive oil and brown the beef cubes for a few minutes on each side. This step adds extra flavor but can be skipped if you’re short on time.
3. Load the Slow Cooker: In the slow cooker, combine the browned beef (or raw beef if you skipped browning) with the carrots, potatoes, onion, and garlic.
4. Add the Liquids: Pour in the beef broth, then stir in the tomato paste, Worcestershire sauce, thyme, rosemary, salt, and pepper. Mix well to ensure that all ingredients are combined.
5. Set the Slow Cooker: Cover and cook on low for 8 hours or on high for 4 hours, depending on your schedule.
6. Finish and Serve: Once the cooking time is up, taste and adjust seasoning if necessary. Serve hot, and enjoy the warm, hearty flavors of your homemade beef stew.
With this easy recipe, your slow cooker will prove to be an essential kitchen gadget that brings both efficiency and deliciousness to your meals!
14. The Coffee Maker: Your Morning Ritual

### 14. The Coffee Maker: Your Morning Ritual
A good coffee maker is an essential kitchen appliance for coffee enthusiasts. Whether you prefer simple drip coffee or a fancy espresso, having the right machine can set the tone for your day.
Customization is key; many coffee makers, such as the [BLACK+DECKER 12-Cup Digital Coffee Maker](https://www.amazon.com/dp/B01GJOMWVA?tag=pintere03ac8c-20), offer adjustable settings for brewing strength and temperature. This allows you to tailor your coffee experience to your liking.
Convenience is another major benefit. Programmable features let you wake up to freshly brewed coffee every morning. The [Keurig K-Mini Single Serve Coffee Maker](https://www.amazon.com/dp/B07GV2S1GS?tag=pintere03ac8c-20) is perfect for those with limited counter space and allows you to brew a quick cup on the go.
For those who take their coffee seriously, investing in a quality machine can enhance the flavor and aroma of your daily cup. The [Breville Barista Express Espresso Machine](https://www.amazon.com/dp/B00CH9QWOU?tag=pintere03ac8c-20) provides the tools to create café-quality espresso right at home.
—
Coffee Recipe: Classic Brewed Coffee
Ingredients:
– 1 cup of water (8 oz)
– 2 tablespoons of coarsely ground coffee (adjust to taste)
Instructions:
1. Measure Water: Start by measuring 1 cup of water using your coffee maker’s water reservoir.
2. Add Coffee Grounds: Place 2 tablespoons of coarsely ground coffee into the filter basket. Adjust the amount based on your preferred strength.
3. Select Settings: If your coffee maker has strength and temperature settings, customize them according to your taste.
4. Brew: Start the brewing process. Wait for your coffee maker to complete the cycle, which usually takes a few minutes.
5. Serve: Once brewed, pour the coffee into your favorite mug.
6. Enjoy: Add any desired cream or sugar, and savor the rich aroma and flavor of your freshly brewed coffee.
Transform your mornings into a delightful ritual!
15. The Pressure Cooker: Speed Meets Flavor

Pressure cookers are fantastic for anyone looking to save time while retaining flavor in their meals. These gadgets use steam and pressure to cook food quickly, making them ideal for busy weeknights.
Key benefits include:
– Flavor intensification: Cooking under pressure locks in moisture and flavor.
– Time efficiency: Prepare meals in a fraction of the time compared to traditional cooking methods.
– Versatility: Perfect for soups, risottos, beans, and tougher cuts of meat that require long cooking times.
For an excellent example, consider the [Instant Pot Duo 7-in-1 Electric Pressure Cooker](https://www.amazon.com/dp/B01NBKTPTS?tag=pintere03ac8c-20). With its 9-in-1 functionalities including a pressure cooker, slow cooker, rice maker, and more, this stainless steel model makes it easy to whip up delicious meals quickly. Plus, it comes with an app featuring over 800 recipes, ensuring you’re never short on ideas.
If you want to take your cooking up a notch, the [Ninja Foodi 9-in-1 Pressure Cooker and Air Fryer](https://www.amazon.com/dp/B07S85TPLG?tag=pintere03ac8c-20) is an impressive choice. This versatile appliance combines the speed of pressure cooking with the crisping capabilities of an air fryer, allowing you to create not only hearty meals but also healthy, crispy snacks.
For those seeking a more straightforward option, the [Presto 6-Quart Electric Pressure Cooker](https://www.amazon.com/dp/B01NBKTPTS?tag=pintere03ac8c-20) is a great solution. It’s perfect for anyone who wants to enjoy the benefits of pressure cooking in a user-friendly format.
—
To get started with pressure cooking, here’s a simple and delicious recipe for a classic Beef Stew that highlights the efficiency and flavor-enhancing abilities of your pressure cooker.
Ingredients:
– 2 pounds beef chuck, cut into 1-inch pieces
– 2 tablespoons olive oil
– 1 onion, chopped
– 3 cloves garlic, minced
– 4 carrots, sliced
– 3 potatoes, diced
– 2 cups beef broth
– 1 cup red wine (optional)
– 2 tablespoons tomato paste
– 1 teaspoon dried thyme
– 1 teaspoon dried rosemary
– Salt and pepper to taste
– 1 bay leaf
—
Instructions:
1. Sauté the Beef: Set your pressure cooker to the sauté function. Add olive oil and let it heat up. Brown the beef chunks in batches, ensuring they are seared on all sides. Remove and set aside.
2. Sauté the Vegetables: In the same pot, add chopped onion and minced garlic. Sauté until the onion is translucent.
3. Combine Ingredients: Return the browned beef to the pot. Add the carrots, potatoes, beef broth, red wine (if using), tomato paste, thyme, rosemary, salt, pepper, and bay leaf. Stir well to combine.
4. Pressure Cook: Close the lid of the pressure cooker and set it to cook on high pressure for 35 minutes.
5. Release Pressure: Once cooking is complete, let the pressure release naturally for about 10 minutes, then do a quick release for any remaining pressure.
6. Serve: Discard the bay leaf and check the seasoning before serving. Enjoy your hearty beef stew with crusty bread or over rice!
—
Try your hand at pressure cooking with these appliance options to create hearty meals that are packed with flavor, all while saving precious time for other activities!
Conclusion: Elevate Your Cooking Game

Equipping your kitchen with the right essential gadgets transforms cooking from a task into an enjoyable experience.
With these must-have appliances, efficiency and creativity can go hand in hand, allowing you to whip up meals with ease and flair.
Take a moment to assess your kitchen space and consider what tools can elevate your culinary journey.
Happy cooking!
Note: We aim to provide accurate product links, but some may occasionally expire or become unavailable. If this happens, please search directly on Amazon for the product or a suitable alternative.
This post contains Amazon affiliate links, meaning I may earn a small commission if you purchase through my links, at no extra cost to you.
Leave a Reply